
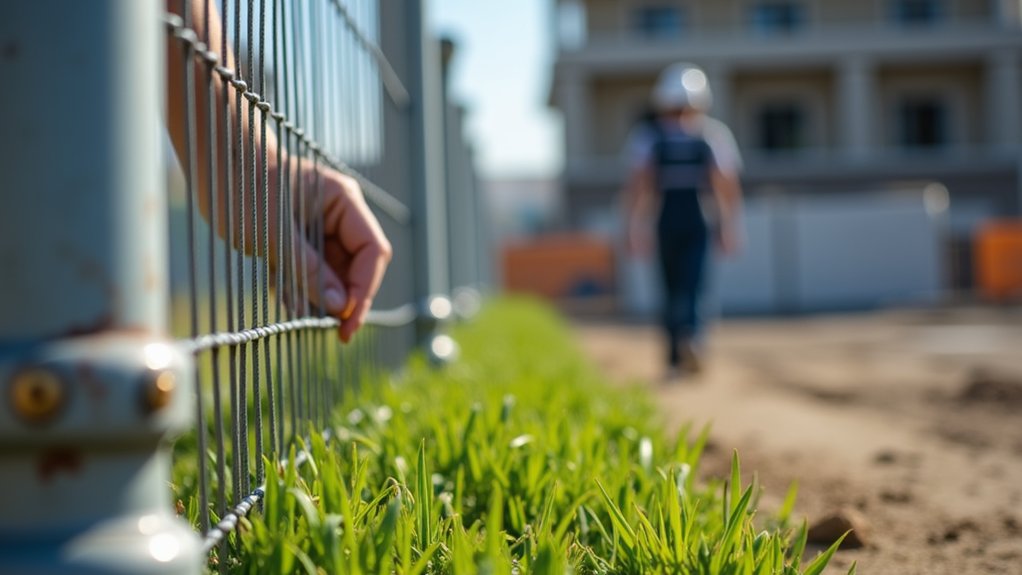
To anchor temporary fencing on soft or uneven ground, first, clear any debris and level the area as much as possible. Check the soil type; use ground anchors like stakes or augers for better stability. If the ground is particularly challenging, heavy concrete blocks can serve as effective ballast to prevent tipping. Ensure all posts are secure and check for any underground utilities. Regular maintenance is essential for safety and effectiveness. For more tips to improve your installation, keep exploring!
Key Takeaways
- Check the soil type and moisture to choose the right anchoring method for soft or uneven ground.
- Use ground anchors, like augers or stakes, to secure the fence posts and keep them stable.
- Place concrete blocks along the fence line for extra weight, especially in windy areas.
- Use angled braces or V-bracing to help resist sideways movement on slopes.
- Regularly inspect the fencing and adjust anchors or add weight as necessary to keep it secure.
Site and Ground Preparation

Before anchoring temporary fencing, properly prepare the site and ground. Clear away debris like rocks, plants, and trash for a clean workspace.
Use string and stakes to mark the fence line for accurate placement. Ensure the ground is level by filling low spots and leveling out high ones to maintain even post height. Thoroughly assess the worksite to identify any potential obstacles before beginning the installation.
If the ground is soft or wet, compact the soil in post holes and consider adding gravel for better drainage. Additionally, proper anchoring is essential for ground stability and ensures the fence remains secure under challenging conditions.
Make sure there are clear access points for equipment and installers, and double-check your alignment before digging.
Proper preparation is key to a secure and effective temporary fence installation.
Assessing Ground Type

Before anchoring your temporary fencing, check the ground type for stability. Look at the soil type—sandy, clay, or loamy—and assess any slopes. Also, consider how nearby plants might affect your setup. This quick evaluation ensures you choose the best anchoring methods, keeping your fence secure. Proper site assessment is crucial for regulatory compliance and effective installation.
Identifying Soil Composition
Understanding soil composition is crucial for securely anchoring temporary fencing, as it affects stability and load-bearing capacity. Begin with soil testing to check moisture levels and identify soil types. Here’s a quick overview:
| Soil Type | Characteristics | Stability Rating |
|---|---|---|
| Type A | Strong and cohesive, unconfined strength ≥1.5 tsf | Most stable |
| Type B | Moderate strength, unconfined strength 0.5-1.5 tsf | Moderately stable |
| Type C | Weak and granular, unconfined strength ≤0.5 tsf | Least stable |
You can also use visual cues and feel tests to gauge grain size and plasticity. This information helps you select the right anchoring methods for different soil types, ensuring safety and effectiveness. Additionally, soil classification is essential for predicting how soil will behave under various conditions, which further informs your anchoring decisions.
Evaluating Slope Gradient
To determine slope gradient for temporary fencing, start with slope measurement tools like digital levels or differential leveling for accurate readings.
Calculate the slope gradient as the ratio of rise over run, using percentages or degrees. Be aware that slopes over 30% need special anchoring due to soil instability.
Break the terrain into segments to evaluate slope percentages, helping you find safe fence placement and necessary adjustments for anchoring.
Always prioritize safety by following building regulations and ensuring your fencing can handle the challenges of steep gradients. Additionally, consider proper fence post installation techniques to enhance stability in varying soil conditions.
Recognizing Vegetation Impact
Evaluating the slope gradient is crucial for understanding how vegetation affects temporary fencing installation. Thick vegetation often requires clearing to ensure proper anchoring, as roots can compromise stability. This can increase the time and effort needed for installation.
Additionally, loose soil under dense vegetation may retain moisture, creating muddy conditions. Be mindful of overhanging branches that could disrupt fence alignment.
Managing vegetation effectively not only aids in installation but also reduces ecological impact. Always check for protected species in the area and consider using eco-friendly materials to protect the site. Furthermore, utilizing high-tensile wire for fencing can enhance durability and stability on uneven ground. Good planning can improve the fence’s durability and safety.
Anchoring Methods for Soft Soil

When setting up temporary fencing in soft soil, use metal stakes for stability.
Make sure they go at least 12 inches deep for the best support.
Ground anchors and augers can provide extra security, especially in shifting or uneven areas.
Metal Stakes Installation Techniques
To anchor temporary fencing in soft soil effectively, choose durable metal stakes, like galvanized steel, or twist-in designs for sandy areas.
Start by moistening the soil for easier penetration. Use a sledgehammer or a plastic driving tool to drive the stakes straight down, ensuring they reach ground level.
After securing the stake, insert the fence post and tighten the bolt to lock it in place.
For extra stability, consider screw fastening through the spike holes. Following these installation tips will enhance your temporary fencing’s stability, ensuring a safe and reliable setup.
Ground Anchors and Augers
To secure temporary fencing in soft soil, ground anchors and augers are your best bet. Options like helical and U-shaped foot anchors provide strong support without concrete.
Installing them is simple: you can twist or screw them in by hand or use power tools for speed. Choose anchors that are about 18 inches long to reach firmer soil and withstand wind.
Using augers or screw-in anchors reduces site disruption and improves load distribution. For added stability, especially on uneven terrain, pair anchors with stabilizers.
Following these steps will give you a reliable temporary fence in challenging soil conditions.
Utilizing Ground Anchors

Using ground anchors is crucial for the stability of temporary fencing, especially in tough soil conditions.
There are different types of anchors, like stakes, augers, and earth anchors, each suited for various soil types and loads. For instance, auger-style anchors screw into the ground, providing solid support in soft soils without the need for digging.
To ensure the best results, install anchors either vertically or at an angle near the fence post bases for added stability. Always check for underground utilities before installation to avoid accidents.
Concrete Blocks for Stability

Concrete blocks may take more effort to set up, but they offer excellent stability for temporary fencing, especially in windy conditions. Acting as heavy ballast, they improve weight distribution and minimize the risk of tipping. Their durability is perfect for tough environments, leading to fewer replacements.
| Concrete Block Advantages | Weight Distribution | Safety Features |
|---|---|---|
| High stability | Customized spacing | Resists tampering |
| Weather resistant | Effective in wind | Complies with standards |
| Reduced liability | Long lifespan | Minimal maintenance |
While installation can be labor-intensive, the advantages of concrete blocks greatly outweigh the initial effort. They effectively prevent fence collapse, boosting site security and safety.
Adapting to Uneven or Sloped Terrain

When installing a fence on uneven or sloped terrain, use the stepped installation method for stability.
Reinforce the fence with braces or anchors to prevent tipping. Adapting your fence to the landscape will improve its durability and safety.
For example, if your yard has a slope, stepping the fence along the incline helps maintain a level appearance while ensuring it stays secure.
Stepped Installation Method
To effectively anchor temporary fencing on uneven or sloped terrain, use the stepped installation method. This technique ensures stability by employing staggered paneling.
- Initial Panel Placement: Start at the highest point of the slope.
- Panel Level Verification: Always check that the panel is level before securing it.
- Staggering Panels: Alternate the positioning of panels, placing some in front and others behind, to follow the slope’s natural contours.
- Adjusting Post Spacing: Space the posts 3 to 6 feet apart, depending on how steep the slope is.
These steps enhance the security and integrity of your fence on uneven ground.
Reinforcement Techniques Required
Once your temporary fencing is securely installed using the stepped method, it’s crucial to reinforce it, especially on uneven or sloped ground.
Here are some effective techniques:
- Bracing: Install angled braces to form a triangular shape that resists sideways movement.
- Ballast: Use heavy concrete blocks or sandbags at intervals to add weight and prevent tipping.
- Anchoring: Secure T-bar and ground anchors for a strong hold in soft soil.
- Material Choice: Use durable materials like steel stakes to strengthen your fencing.
Regularly check your setup to ensure it remains stable and can withstand wind and soil shifts.
Reinforcing With Brace Posts

When setting up temporary fencing, using brace posts is crucial for stability. Choose durable materials like galvanized steel or treated wood that won’t rust.
Position brace posts at a distance of 2.5 times the height of the fence (about 8 feet apart). Use a level to ensure they’re vertical, then attach diagonal brace arms at a 45-degree angle for support.
Make sure cross members fit tightly between the end and brace posts, secured with galvanized hardware. Before digging, clear the area and level the ground to ensure the holes are deep enough to stabilize the posts.
This approach will significantly strengthen your fencing system.
Additional Stability Enhancements

To enhance the stability of your temporary fencing, consider these effective methods:
- Sandbags: Place sandbags along the fence line to lower the center of gravity and boost stability without digging into the ground.
- Bracing: Use V-bracing or triangle bracing to withstand lateral forces, especially on uneven terrain.
- Ground Anchors: Secure fence panels with stakes or augers, but remember to check for underground utilities first.
- Concrete Blocks: Position heavy concrete blocks at intervals for a solid foundation, especially in windy areas.
These strategies will keep your temporary fence secure and effective in various conditions.
Tools and Equipment for Installation

When installing temporary fencing, having the right tools is crucial for a secure and efficient setup. Start with essentials like hammers, pliers, and post drivers to assemble the parts and drive posts into the ground.
A power drill is useful for tightening bolts, while measuring tools ensure even post spacing for stability. If the ground is soft or uneven, use post hole diggers and tampers to properly secure the posts.
For maintaining tension during installation, wire handling tools like come-along tools and wire stretchers are helpful. Don’t forget safety gear like gloves and goggles to protect yourself.
Following these steps will result in a strong and safe fencing solution.
Safety and Compliance Considerations

Proper anchoring of temporary fencing is crucial for safety and compliance. Here are key factors to consider:
- Local Regulations: Always check with local authorities for specific anchoring guidelines.
- OSHA Standards: Ensure the fencing is stable and free from hazards, such as sharp edges or tripping risks.
- Soil and Drainage: Consider the soil type and drainage conditions to prevent instability.
- Permit Requirements: Follow any specified anchoring methods, especially in sensitive areas.
Neglecting proper anchoring can result in fines, project delays, and increased liability.
Regular Inspections and Maintenance

Regular inspections and maintenance are crucial for the safety and effectiveness of temporary fencing. Conduct formal inspections weekly to meet local regulations and ensure the fence remains structurally sound.
Users should perform daily checks to spot any damage, leaning panels, or loose connections. After severe weather, inspect the fencing again to catch any new issues.
Follow maintenance protocols by checking fence panels for damage and ensuring hardware is tight. Pay extra attention to rust-prone areas, especially at the bottom of chain-link fencing.
Keep a record of your findings to stay compliant and identify any recurring problems. By following these guidelines, you’ll improve the durability and reliability of your temporary fencing, ensuring safety for everyone.
Frequently Asked Questions
How Long Does It Take to Install Temporary Fencing?
Installing temporary fencing usually takes a few hours to a full day, depending on the size of the crew and site conditions. For instance, a larger team can set up fencing more quickly than a smaller one. Faster installation not only improves efficiency but also ensures safety for everyone involved.
Can I Use Temporary Fencing for Pets?
Yes, you can use temporary fencing for pets! Just choose strong options like chain link or portable panels, and monitor your pets to prevent escapes.
What Materials Are Best for Temporary Fencing?
For temporary fencing, steel provides strength, aluminum is lightweight for easy movement, and plastic is convenient for transport. Each material serves different needs, ensuring safety and durability tailored to your environment.
How Do I Remove Temporary Fencing After Use?
To take down temporary fencing, start by untying the ties and rolling up the mesh. Make sure to safely store the posts to avoid any damage, and clean them for future use. Always keep safety in mind while you work.
Are There Specific Regulations for Temporary Fencing in My Area?
Navigating local regulations for temporary fencing can be tricky. It’s essential to check your area’s specific rules and obtain the necessary permits. This ensures you comply with the law, avoid fines, and keep your project safe. For instance, some places may require fencing to be a certain height or have specific materials. Always do your homework to stay on the right side of the regulations.
Conclusion
To anchor temporary fencing on soft or uneven ground, use these straightforward techniques. Start by selecting appropriate anchors, like stakes or weights, that can grip the ground effectively. Regularly check the stability of your setup to prevent any collapses. With proper preparation and the right tools, you can create a strong, reliable barrier that meets safety regulations and offers peace of mind. Strong anchors lead to secure boundaries, so make sure yours are up to the task!

In exploring the best temporary fencing options for construction sites, discover which solutions ensure security and compliance while enhancing site Read more
Learn essential tips for maintaining temporary fencing that can extend its lifespan and prevent costly repairs—discover the best practices for Read more

A guide to selecting lightweight temporary fencing that ensures easy transport and quick setup awaits, revealing options that perfectly suit Read more


