Building a DIY wooden fence is a straightforward process. First, plan your project: determine why you need the fence, check local regulations, and measure your yard accurately. Next, select quality materials and decide on the fence design that suits your needs.
Start by installing the posts, ensuring they are evenly spaced. Then, attach the rails and finally, add the pickets or panels. Don’t forget to construct a sturdy gate for easy access. After everything is assembled, do a few touch-ups to enhance the look.
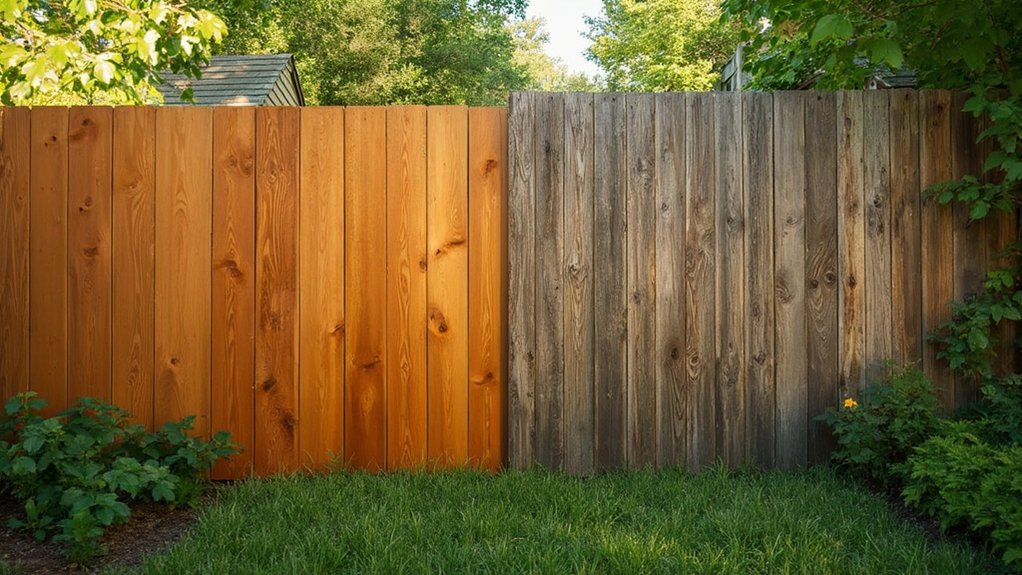
To keep your fence looking great, perform regular maintenance. For example, check for loose boards and apply a fresh coat of stain or paint every few years to protect it from the elements. Follow these steps, and you’ll have a functional and attractive wooden fence in no time!
Key Takeaways
- First, determine why you need the fence and check local laws to ensure your project meets regulations.
- Choose sturdy, weather-resistant materials that will last and look good, keeping your area’s climate in mind.
- Set your posts securely and level, spacing them according to local guidelines for stability.
- Attach the rails and pickets evenly, ensuring they are stable and meet height requirements.
- Build the gate with durable materials, making sure everything is securely fastened for long-lasting use.
Preparation and Planning

When you’re ready to install a wooden fence, preparation and planning are key.
Start by defining the purpose of your fence—like privacy, marking property lines, or improving your yard’s look. Check local rules and regulations to ensure you follow zoning laws and building codes, which may include height restrictions and permit requirements. Proper planning is crucial for a successful fence project, as it helps ensure everything is in place before you start. Additionally, understanding the local regulations can prevent potential issues during installation.
Measure your yard carefully to determine how much material you’ll need. Make a list of the type of wood, posts, and hardware required, and gather tools such as shovels and safety gear.
Post Preparation

When preparing for fence posts, selecting the right materials is crucial, alongside determining the ideal length and spacing. Consider durability and the local weather to ensure your fence remains sturdy. Additionally, following proper placement and spacing guidelines is essential for both stability and aesthetics. Ensuring local regulations are adhered to can prevent potential issues during the installation process. It is also important to conduct property surveys to accurately determine your property boundaries before beginning construction.
Choosing Right Post Material
Choosing the right post material for your wooden fence is crucial for its durability and maintenance. Here are your options:
- Pressure-treated lumber: This is a popular choice because it resists rot and insects. Additionally, it is important to consider that wood fencing can be susceptible to damage from weather events, which may impact your choice of post material.
- Cedar and redwood: These are naturally durable but can be more expensive.
- Metal posts: For added strength, metal posts work well with wood.
- Treated pine: A budget-friendly option that can be pressure-treated for extra durability.
Consider local weather and soil conditions when choosing your material. Additionally, ensure compliance with local regulations to avoid fines and ensure proper installation.
Making the right choice now will save you time and money later, ensuring your fence lasts for years.
Determining Post Length
Choosing the right post length is crucial for a sturdy wooden fence. For a 6-foot fence, use 8-foot posts, allowing 2 feet underground.
Ensure posts are at least one-third of the fence height buried for stability. Soil type matters too; in soft soil, dig deeper for security. The recommended depth for fence post holes is 600mm (2 ft), which helps prevent leaning and ensures stability. Climate can also impact how deep you need to go. Lastly, add gravel at the bottom of the holes for better drainage and durability.
Spacing and Placement Guidelines
To ensure your wooden fence is sturdy and looks good, follow these spacing and placement guidelines:
- Post Spacing: Space posts 6 to 8 feet apart for a solid structure.
- Terrain Considerations: If the ground is unstable, place posts closer together for extra support.
- Alignment: Use stakes and string lines to keep posts straight.
- Obstacles: Adjust the position of posts around trees and rocks to avoid issues.
- Hole Depth: Dig post holes at least one-third to one-half the height of the post for better stability. Additionally, aim for post holes 24-30 inches deep to ensure optimal stability based on soil type.
Post Installation

Installing your fence posts properly is crucial for a strong and durable fence. Start by marking the fence line with stakes and string, ensuring posts are spaced 6 to 8 feet apart.
Before you dig, call 811 to check for underground utilities.
When digging, make the holes one-third the height of the posts plus an additional 6 inches for gravel. Use tools to ensure each post is level and plumb, and brace them temporarily with two-by-fours.
For extra strength, fill the holes with concrete, especially for corner and gate posts. After backfilling, compact the soil well to secure the posts.
Regular inspections will help keep your posts in good shape over time.
Rail Installation

With your posts set, it’s time for rail installation.
Choose 2×4 lumber for the rails and ensure they’re aligned properly for both strength and looks.
Once in place, use rust-free fasteners to secure the rails, creating a solid framework for your fence.
Rail Material Selection
Choosing the right rail material is crucial for a durable and visually appealing fence. Here are some options to consider:
- Pressure Treated Wood: Highly durable against moisture.
- Cedar: Naturally rot-resistant, ideal for wet areas.
- Pine and Spruce (SPF): Affordable choices, often paired with treated wood.
- Redwood: Offers beauty and decay resistance, but at a higher cost.
- Furring Strips: Lightweight supports for specific designs.
Selecting durable materials ensures your fence can handle environmental challenges and lasts longer.
Keep both aesthetics and maintenance in mind to create a strong, attractive fence. Choose wisely!
Proper Rail Alignment
Proper rail alignment is crucial for the stability and appearance of your wooden fence. If your terrain is sloped, use a stepped installation to keep the rails level. Mark your measurements carefully to ensure the top rail aligns with the posts.
Start the first rail about 9.5 inches from the bottom and keep a consistent gap of 2’-5” between each rail. Use a mason’s line to check straightness across all posts. Avoid steep angles and uneven placements by adapting to your slope.
Finally, guide blocks can help streamline the process and ensure uniformity throughout your fence.
Secure Rail Attachment
To ensure your fence is sturdy and visually appealing, follow these straightforward steps for secure rail attachment:
- Choose durable materials like 5/8″ x 3.5″ or 2″ x 4″ pressure-treated lumber.
- Drill starter holes in the rails to prevent splitting when you attach them.
- Use exterior screws or nails for a solid connection to the posts.
- Keep the rails level with a carpenter’s level for proper alignment.
- Regularly check and tighten fasteners to prevent warping.
These tips will help you build a fence that lasts.
Picket or Panel Installation

Installing a picket fence requires careful planning for a solid and attractive result.
First, evaluate your yard’s slope; if it’s uneven, consider racking the fence. Use durable materials like cedar or treated pine, and check local regulations for height and style limits.
For a classic look, leave a 2.5-inch gap between pickets. Attach them to the rails with brad nails, ensuring they’re spaced evenly and aligned with a level. Pay attention to leveling, especially at corners.
Gate Installation

Installing a gate can improve both the function and look of your wooden fence. Here are some essential tips:
- Gate Size: Measure the gap between your fence posts to determine the right size.
- Materials: Get wood, hinges, and a latch for a strong build.
- Hinges: Use sturdy, weather-resistant hinges for durability.
- Swing Direction: Decide how the gate will open for better support.
- Design: Pick a gate style that matches your fence and yard aesthetics.
Keeping these points in mind will help you create a gate that works well and looks great.
Final Touches

As you finish your DIY wooden fence, focusing on final touches is essential for both durability and appearance.
Start by sealing the wood with a good sealant like varnish or oil, applying it before and after installation to protect against moisture and weathering.
Make sure your posts are stable by filling holes with gravel and securing them with concrete—let the concrete cure completely and check that everything is plumb.
Align and secure the rails, ensuring they’re level and evenly spaced.
Finally, inspect your work, fix any flaws, and touch up scratches for a polished look.
Maintenance Tips

To keep your DIY wooden fence in top shape, follow these simple maintenance tips:
- Check for loose pickets or rust at least once a year.
- Reapply sealants or stains every few years for protection.
- Trim back plants to reduce moisture and pest problems.
- Clean your fence regularly with a wire brush or pressure washer.
- Set aside a budget for repairs to avoid expensive replacements later.
Frequently Asked Questions
How Do I Choose the Right Fence Style for My Property?
To choose the right fence style, start by assessing your property lines and the look you want. Consider how much privacy and security you need. For example, if you have kids or pets, a tall, solid fence might be best. If you want to enhance your home’s curb appeal, a decorative picket fence could be a great choice. Make sure the style fits both your home and the neighborhood for a cohesive look.
What Is the Average Cost of Building a Wooden Fence?
Building a wooden fence costs between $1,920 and $4,821, which includes both materials and labor. Most homeowners spend about $3,220, depending on the type of wood and style of the fence. For example, a simple picket fence will generally be less expensive than a privacy fence made from premium wood.
Can I Install a Fence on a Slope?
Yes, you can install a fence on a slope. To tackle the challenges of uneven ground, consider using the racking or stepping methods. These techniques help maintain the fence’s look while adapting to the terrain.
How Do I Ensure My Fence Is Compliant With Local Laws?
To ensure your fence meets local laws, start by checking zoning regulations and securing any required permits. Look into height limits and approved materials. It’s also wise to talk to your neighbors to prevent conflicts and ensure a hassle-free build.
What Tools Are Essential for a DIY Fence Project?
Building a fence requires the right tools. Key items include measuring tapes to ensure accurate lengths, safety gear to protect yourself, a circular saw for cutting materials, and fasteners to secure everything in place. These essentials help you work efficiently and ensure a strong, safe fence.
Conclusion
Congratulations on building your DIY wooden fence! You’ve created a strong barrier that adds charm to your property while ensuring privacy and security. Remember to regularly inspect it for any wear and tear, and address any issues quickly to keep it looking great. With proper maintenance, your fence can last for years. Enjoy your new outdoor space!
Find out which fencing option offers superior longevity and durability, and discover how your choice can impact maintenance and costs Read more

Find the perfect pool fencing ideas that blend safety and style to elevate your backyard oasis—discover what options await you!

Uncover the ideal wood types for fencing that match your style and environment—each option holds secrets to durability and beauty Read more